When faced with the task of removing adhesive tiles, it can feel like peeling back layers of a stubborn puzzle. But fear not, as there are methods to tackle this challenge efficiently. By following a few simple steps and armed with the right tools, you can smoothly transition your space from outdated to refreshed. So, let’s begin this journey of uncovering the secrets to successfully removing adhesive tiles. Also Read Manufacturers of Tile Adhesive, Wall Putty & Epoxy Grout
Assessing the Tile Surface
- Before proceeding with the removal process, ensure that the tile surface is thoroughly examined for any signs of damage or irregularities. Start by evaluating the overall condition of the tiles. Look for cracks, chips, or any areas where the tiles may have come loose. Pay close attention to the grout lines as well, as they can indicate underlying issues with the adhesive or subfloor.
- Next, conduct a detailed surface inspection. Run your hands over the tiles to feel for any unevenness or raised edges. Use a flashlight to check for shadows or dips that could signal underlying problems. Look out for discoloration, water damage, or mold growth, as these could indicate issues with moisture or improper installation.
- Take note of any areas that require special attention or repairs before proceeding with the removal process. By thoroughly evaluating the damage and conducting a detailed surface inspection, you’ll be better prepared to tackle the task of removing adhesive tiles effectively and efficiently.
Gathering the Necessary Tools
- Inspecting the tile surface thoroughly for any damage or irregularities will guide you in selecting the appropriate tools required for removing adhesive tiles effectively.
- When choosing appropriate tools for this task, consider having a putty knife or a scraper to help loosen the tiles from the surface. A heat gun can also be handy for softening stubborn adhesive. Additionally, having a hammer and a chisel can assist in breaking apart particularly resistant tiles.
- Proper tool maintenance is crucial to ensure they work efficiently. Keep your tools clean and free of any debris that could hinder their performance. Regularly sharpen blades and replace any worn-out or damaged tools to prevent accidents and ensure smooth removal of adhesive tiles.
Loosening the Adhesive Bond
- To effectively loosen the adhesive bond on the tiles, begin by gently applying heat using a heat gun to soften the adhesive underneath. This process helps in breaking the bond between the adhesive and the surface of the tiles, making it easier to remove them. When using the heat gun, ensure to keep it at a moderate temperature and maintain a safe distance to prevent damage to the tiles or the surrounding area.
- If the adhesive proves stubborn even after applying heat, you can consider using solvents. Apply the solvent to the adhesive and let it sit for a few minutes to allow it to penetrate and weaken the bond. Be cautious when working with solvents and ensure proper ventilation to avoid inhaling harmful fumes. After letting the solvent do its work, gently scrape off the adhesive using a putty knife or a scraper tool. Repeat the process until all the adhesive is removed, leaving a clean surface ready for new tiles.
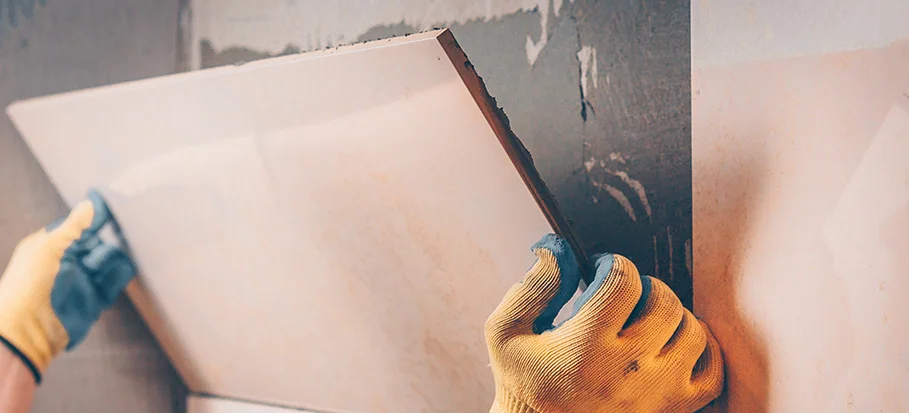
Removing the Adhesive Tiles
- When removing the adhesive tiles, the softened adhesive from the heat gun or solvent application will now be ready for careful removal using a putty knife or scraper tool. If you’ve opted for the heat gun method, gently insert the tool underneath the softened adhesive and slowly work your way across the tile. Be cautious not to apply too much pressure to avoid damaging the underlying surface. The heat gun helps to loosen the adhesive, making it easier to lift the tiles without leaving residue behind.
- Alternatively, if you chose the chemical solvent alternative, apply the solvent as directed by the manufacturer. Allow it to penetrate the adhesive for the recommended time to ensure effective softening. Once the adhesive is sufficiently softened, use a putty knife or scraper tool to gently pry the tiles away from the floor. Work methodically, ensuring each tile is removed cleanly without excessive force. Proper technique is crucial to prevent any damage to the subfloor during the tile removal process.
Cleaning Up and Preparing the Surface
- After removing the adhesive tiles, the next step involves thoroughly cleaning up the surface and preparing it for any necessary repairs or new flooring installation. Start by inspecting the surface for any remaining adhesive residue or debris. Use a scraper or putty knife to gently remove any stubborn adhesive. Once the majority of the adhesive is removed, clean the surface with a mixture of warm water and mild detergent. Scrub the area using a sponge or brush to ensure all residues are eliminated.
- After cleaning, allow the surface to dry completely before proceeding with any repairs or new flooring installation. Inspect the surface for any imperfections or damage that may need to be addressed before laying down new flooring. Fill in any cracks or holes with a suitable filler and ensure the surface is smooth and level.
- Before installing new flooring, it’s crucial to prime the surface to ensure proper adhesion. Choose a primer that’s compatible with both the surface material and the new flooring type. Apply the primer according to the manufacturer’s instructions and allow it to dry completely before proceeding. Following these surface preparation and cleaning techniques will help ensure a successful flooring installation.
Conclusion
Now that you have successfully removed the adhesive tiles, make sure to properly clean up any leftover residue and prepare the surface for any new flooring installation. Remember to take your time and be thorough in your process to ensure a smooth and clean finish. With the right tools and techniques, you can easily remove adhesive tiles without damaging the underlying surface.